
How to Install Temporary Fencing on a Work Site
Learn how to install temporary fencing for construction sites, events, and property protection, with practical layout, anchoring, and safety steps on site.
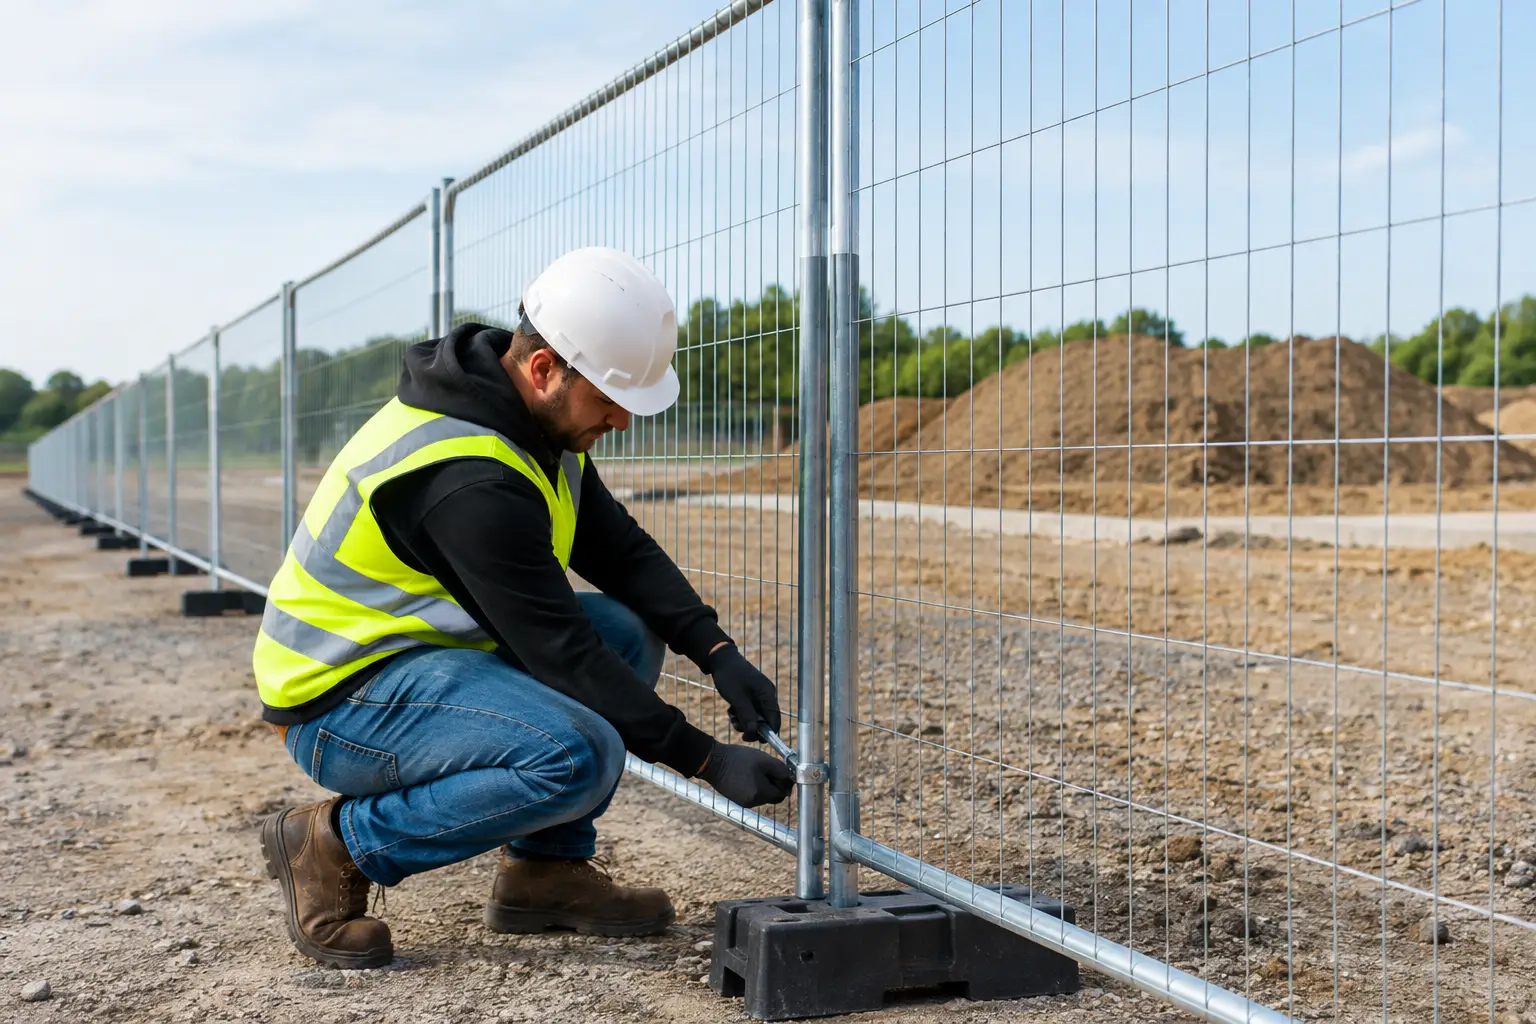
Temporary fencing only works when it stays where it was put. A few loose panels may mark a boundary, but they will not reliably keep people out, protect equipment, or stand up to wind and daily site activity. Knowing how to install temporary fencing correctly starts with choosing a system that fits the site, then securing every panel, gate, and base for the conditions it will face.
For construction, commercial, industrial, and event sites across the River Valley, temporary fence is often the first line of perimeter control. It can help separate active work from the public, limit unauthorized access, protect stored materials, and create a clear route for deliveries and crews. The right installation depends on the ground surface, expected traffic, weather exposure, and how long the fence will remain in place.
Start With the Site Plan
Walk the perimeter before unloading panels. Identify the property line or work-zone boundary, access points, delivery routes, changes in elevation, drainage paths, and areas where the public could approach the site. A temporary fence layout should support the work being done rather than create new problems for equipment operators, pedestrians, or emergency access.
Mark where gates need to go before setting the first panel. A gate placed in the wrong location can force trucks to make difficult turns, create a bottleneck at shift changes, or leave crews climbing over fence sections. Construction sites commonly need a wider vehicle gate and a separate pedestrian gate so workers are not entering through the same opening as trucks and machinery.
Before driving posts or using any ground-penetrating anchors, call for utility locating as required. Even a shallow installation can create risk where underground utilities, irrigation lines, private electrical runs, or communications lines are present. Do not assume an area is clear because it is outside the main building footprint.
Choose the Right Temporary Fence System
Temporary fencing is not one product used the same way on every project. Freestanding chain link panels are common for paved lots, short-term construction sites, events, and areas where digging is not practical. Panels are typically supported by weighted bases and connected with clamps. They install quickly and can be moved as a project changes.
Driven-post temporary chain link is often a better choice for longer projects, larger open areas, or sites exposed to high winds. Posts set into the ground give the fence more holding strength than freestanding bases alone. This option takes more planning and labor, but it is generally more secure where the perimeter needs to remain in place for months.
Privacy screening can be added when dust control, visual separation, or site security calls for it. Keep in mind that screen fabric catches wind. A fence that performs well without screen may need additional bracing, ballast, or closer post spacing once privacy material is installed.
For a basic setup, have the panels or fence fabric, posts or bases, clamps, braces, gate hardware, and appropriate ballast ready before installation begins. The job also calls for a tape measure, marking paint, level, string line, work gloves, and tools suited to the system being installed.
How to Install Temporary Fencing With Panels
Freestanding panels provide flexibility, but they must be installed in a straight, connected, and properly weighted line. Begin at a corner or gate location. Set the first fence panel into its bases and use a level to keep it upright. Place the next panel in position, align the frame, and connect the two panels with panel clamps near the top and bottom.
Continue one section at a time, checking alignment often. Small errors at the beginning become more noticeable over a long run. A string line can help maintain a clean perimeter, particularly along a street frontage or a commercial property where appearance matters.
Use corner braces or stabilizer bars where the fence changes direction. Corners, ends, and gate openings take more force than a straight line of panels. They should not rely on a single lightweight base. Add weight to bases according to the panel manufacturer’s requirements and site conditions. Concrete blocks, approved sandbags, or purpose-built ballast may be used, but loose materials should not create a trip hazard or block drainage.
Never count on panel clamps alone to prevent movement. Clamps connect panels, but braces and weighted bases resist wind and pressure. If the fence is installed on uneven ground, address the gap beneath the panels as needed. Large openings can allow people, animals, or materials to pass underneath, reducing the value of the enclosure.
Installing Driven-Post Temporary Chain Link
When more strength is needed, a driven-post system may be the better fit. Start by laying out the line and marking post locations. Post spacing depends on the fence height, fabric type, terrain, and design, but consistent spacing is essential for a straight, stable installation.
Drive or set terminal posts at corners, ends, and gate locations first. These points carry the tension of the fence fabric. Then install line posts along the run, checking plumb as work progresses. On sloped ground, the fence may need to follow the grade or step down in sections. The right method depends on the slope, required clearance, and how secure the bottom edge needs to be.
Attach rails, tension wire, or braces as required by the system. Unroll the chain link fabric carefully along the fence line, connect it at one terminal post, and stretch it evenly before fastening it to the remaining posts. Fabric that is too loose can sag and invite climbing or pushing. Fabric stretched too aggressively can strain posts, fittings, and connections.
Finish by securing the bottom edge where necessary. For sites with security concerns, erosion, or uneven ground, bottom tension wire and additional attachment points can help limit gaps and movement.
Set Gates Up for Daily Use
A temporary fence gate should operate easily and close securely every time. Install gate panels on stable posts, frames, or reinforced fence sections rather than hanging them from an ordinary panel connection. The opening must be wide enough for the largest expected vehicle, including trailers, forklifts, delivery trucks, or emergency equipment.
Check gate swing before finalizing the layout. A swinging gate needs clear space on the inside or outside of the fence line. Where room is limited, a sliding temporary gate arrangement may be more practical. Use a latch that can be secured, and establish who is responsible for opening, closing, and locking the gate at the start and end of each day.
If access must be controlled after hours, temporary fencing can be part of a larger security plan that includes lighting, signage, cameras, and a more substantial gate solution. The fence creates the boundary, but it should work with the rest of the site’s security measures.
Plan for Wind, Weather, and Public Contact
Wind is one of the most common reasons temporary fencing fails. Open fields, elevated sites, parking lots, and job sites with long uninterrupted fence runs all deserve extra attention. Inspect braces, ballast, and panel connections after storms or strong gusts. If screen fabric is installed, treat it as a major wind-load factor, not a simple accessory.
Rain brings different concerns. Standing water can soften soil around driven posts, shift ballast, and make gate areas difficult to use. Keep fence lines out of natural drainage routes where possible, and do not place bases where they will block water flow toward storm drains.
Where the public can reach the fence, inspect for sharp edges, damaged wire, protruding clamps, and unstable panels. Add clear warning signs where appropriate, especially around active construction, excavations, restricted equipment areas, or controlled entry points. Temporary fencing should make a site safer, not add an avoidable hazard.
Inspect the Fence Throughout the Project
Temporary does not mean maintenance-free. Inspect the perimeter after installation, after severe weather, and at regular intervals during the project. Look for loose clamps, shifted bases, bent panels, sagging fabric, open gates, washouts, and signs that someone has tried to climb or move the fence.
A quick inspection is especially valuable after deliveries, utility work, or equipment movement near the boundary. Crews may need to remove a panel for access and fail to reinstall it with the same bracing or ballast. Make perimeter checks part of normal site supervision rather than waiting for a breach or damaged section to be reported.
For larger or security-sensitive projects, professional installation is usually the practical choice. Ace Fence Company Inc. can help evaluate the site, select a temporary fencing approach, and provide an installation that accounts for gates, access needs, terrain, and the expected duration of the work.
A well-installed temporary fence gives a project a clear edge: it defines where work begins, where visitors stop, and where valuable equipment stays protected. Set it with the same care you would give a permanent perimeter, and it will serve the site far better from the first day through final cleanup.
Ready to Talk to a Real Fence Professional?
Free on-site estimates from the River Valley's most trusted fence company since 1963.